Dungeons
This season, Brewmaster is looking really strong in all of the dungeons. There aren't really any scary tank busters, making this season much more relaxed. In this section of the guide, we will go over how strong we are in each dungeon, the routes for each dungeon, aswell as tricks for difficult bosses.
Dungeon Difficulties
None of the dungeons are really hard for Brewmaster, and with them being so new, there is not much to say regarding them.


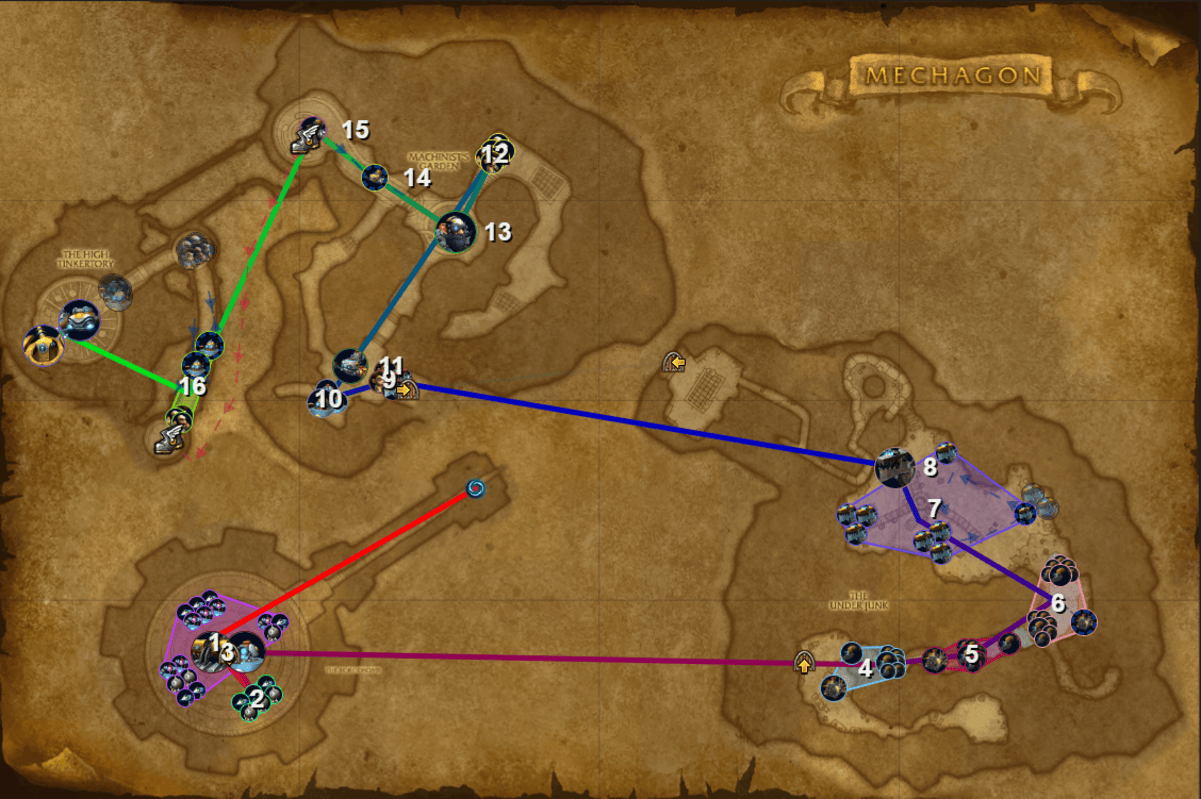
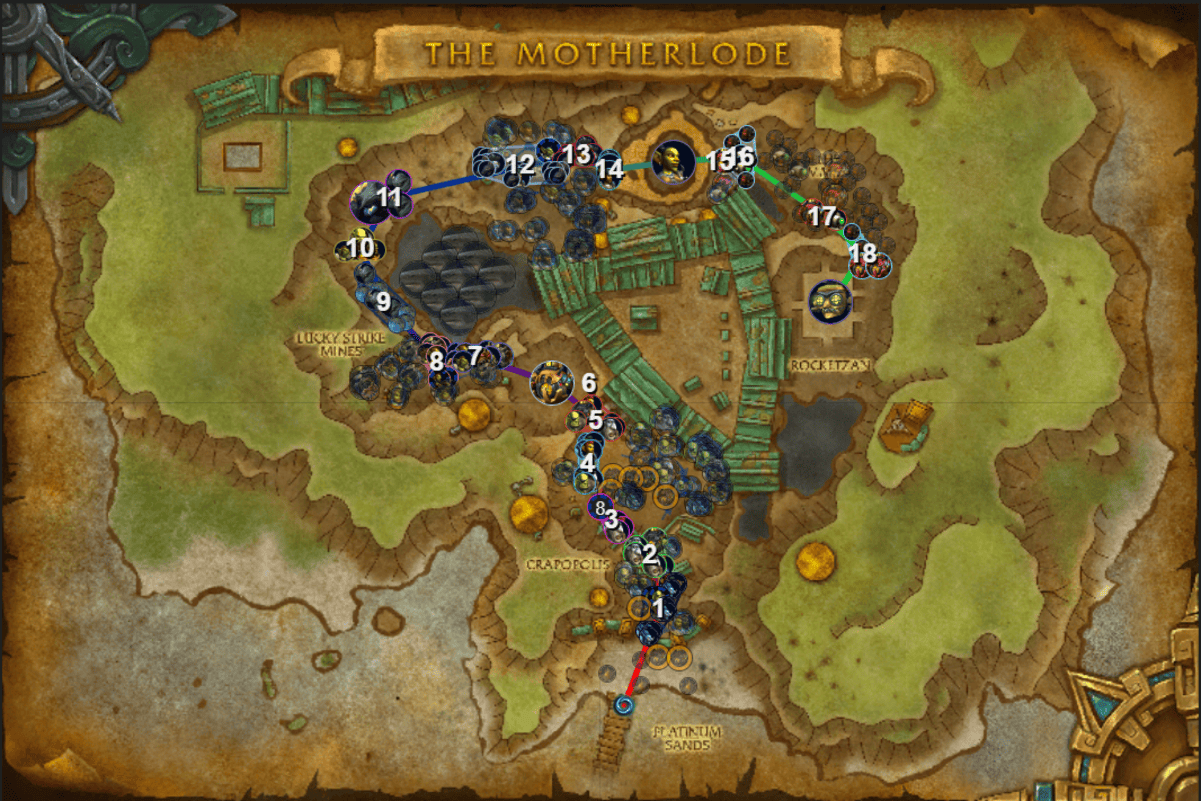
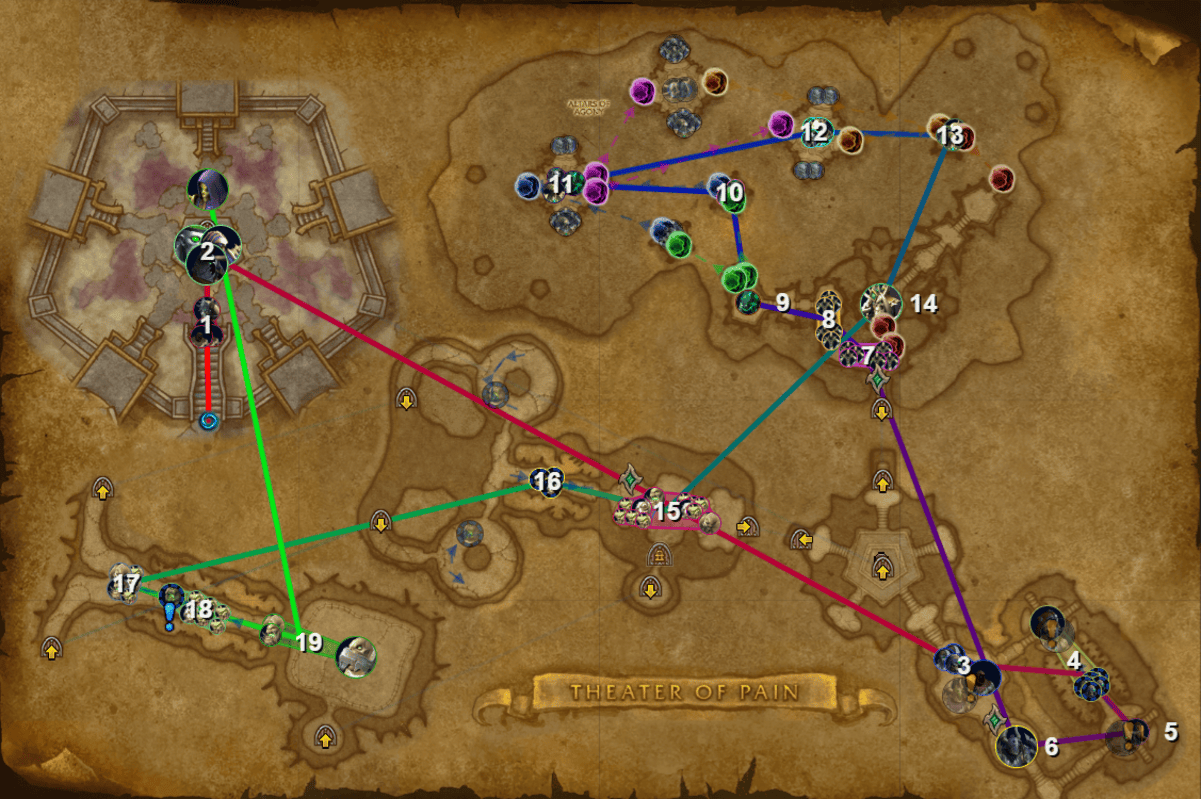
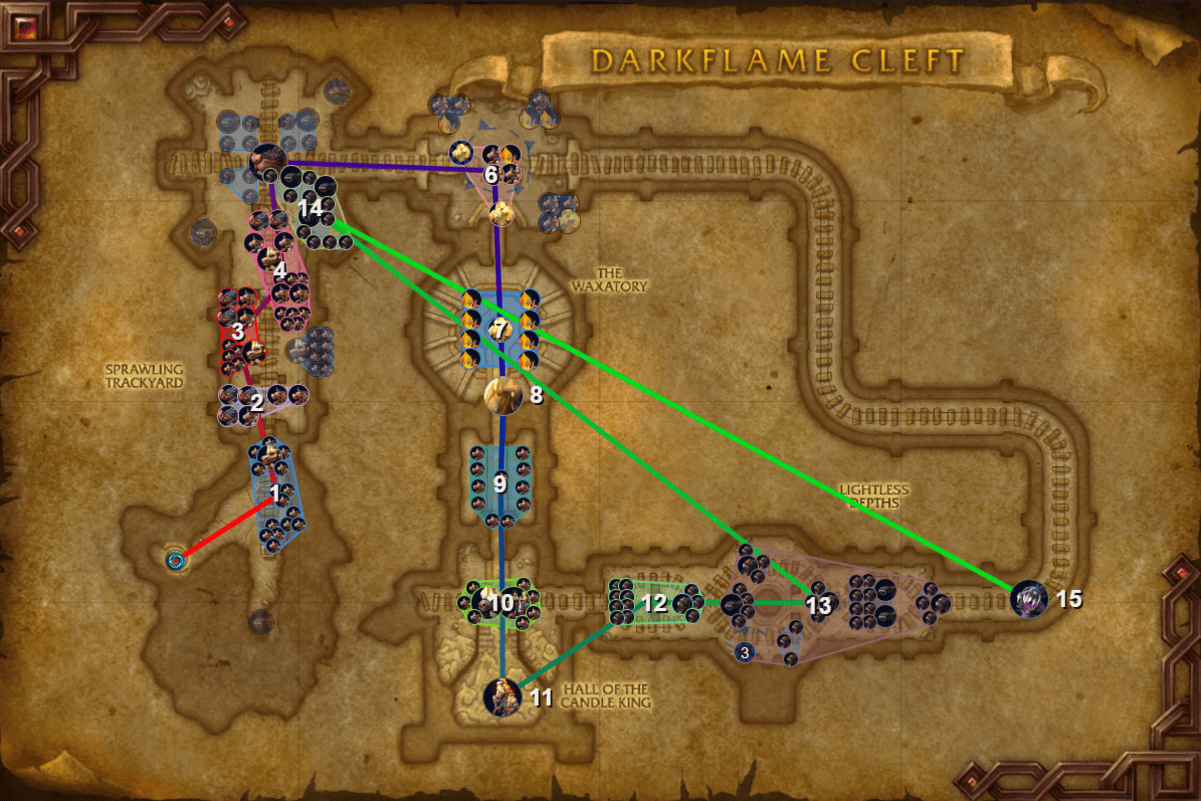
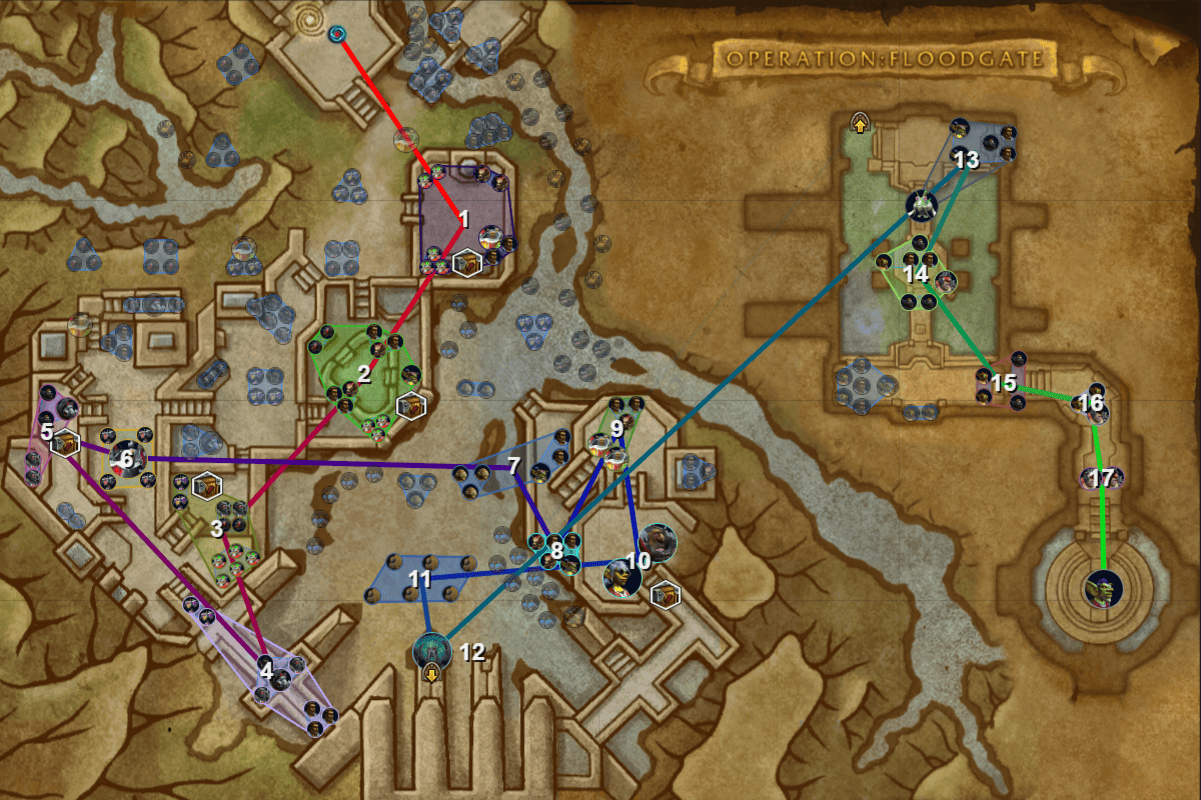
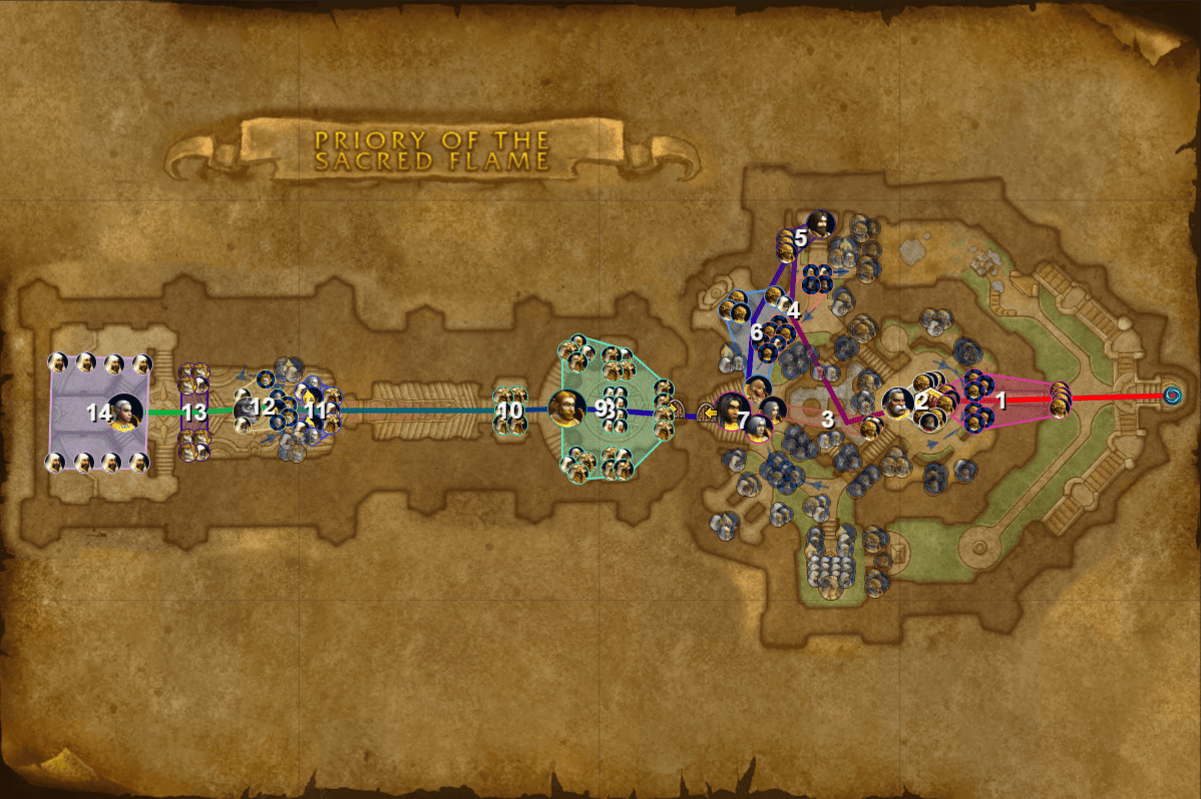
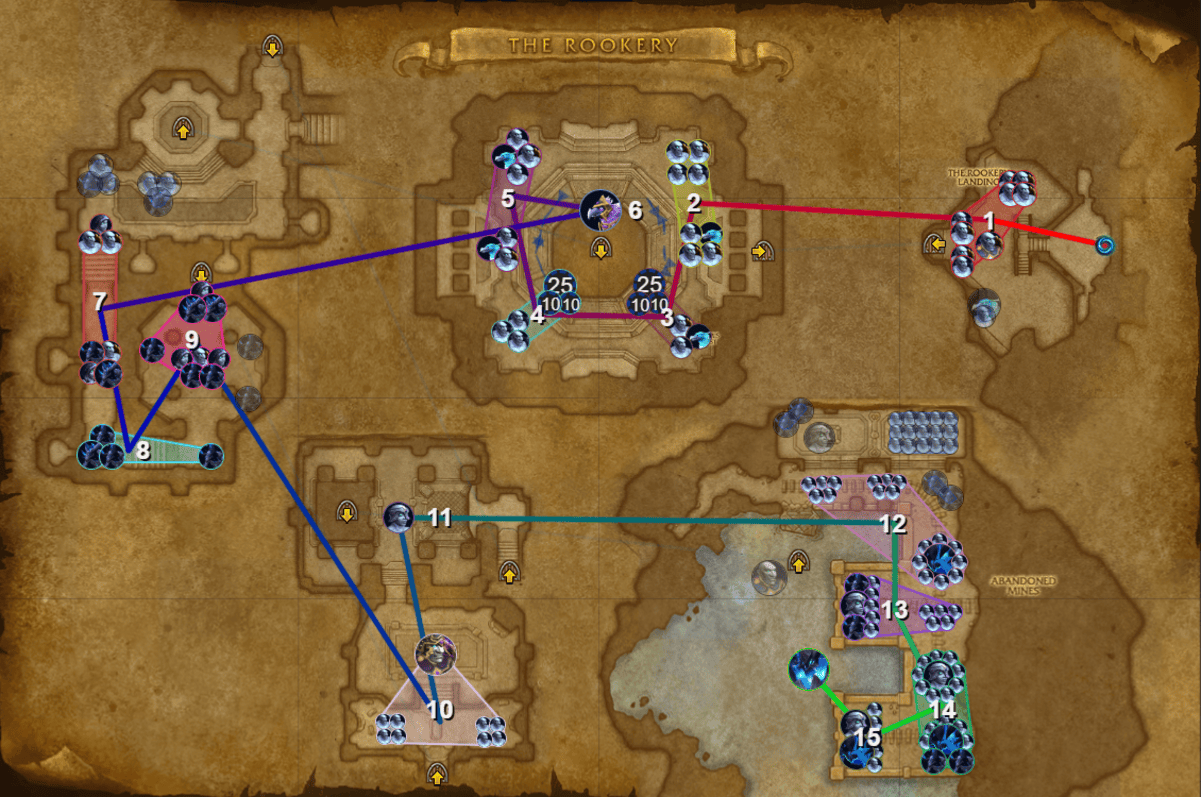
Dungeon Routes
Every route is designed to be as pug friendly as possible. Routes may vary based on your team composition and level of play.
Bloodlust Timings: First Pull or First Boss, Bosses on CD
Bloodlust Timings: First Boss after First Set of Footballs, Bosses on CD
Bloodlust Timings: First Boss, Bosses on CD
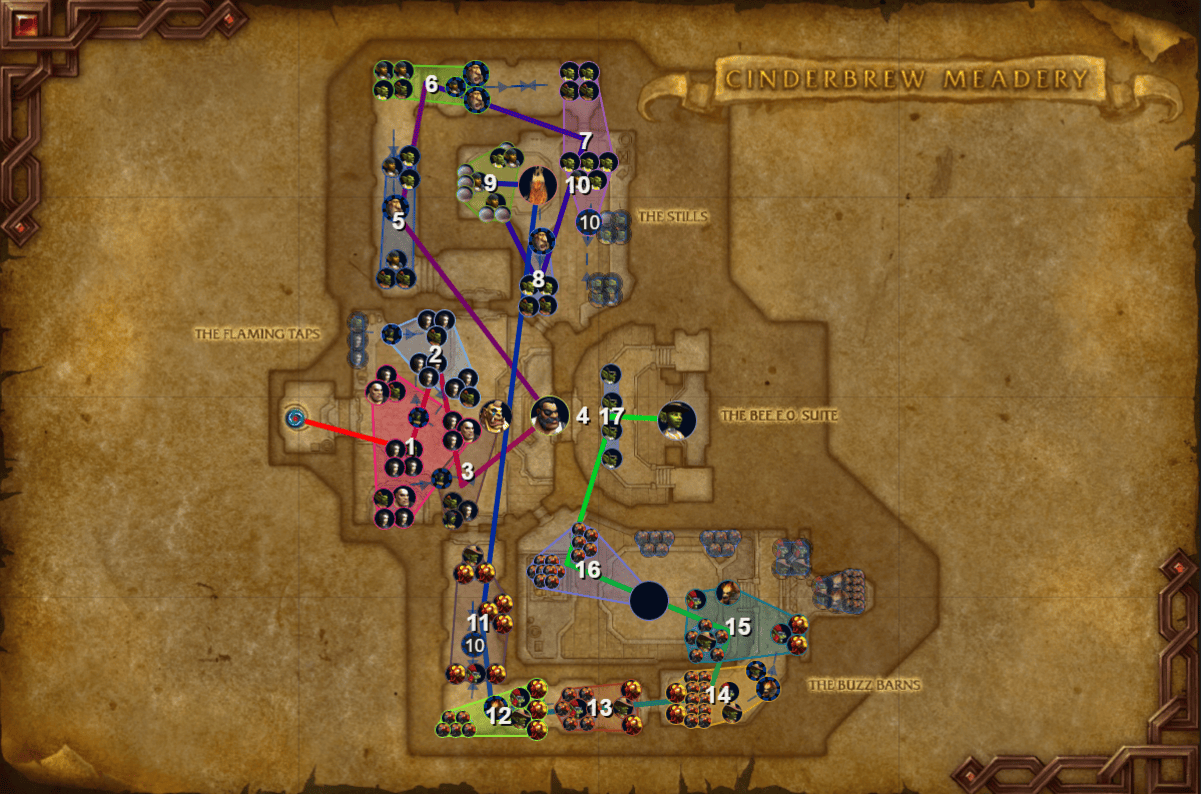
Bloodlust Timings: First Pull, Bosses on CD
Bloodlust Timings: First Pull, Bosses on CD
Bloodlust Timings: First Pull, Bosses on CD
Bloodlust Timings: First Pull, Bosses on CD
Bloodlust Timings: First Pull, Bosses on CD
Brewmaster Comps
This will be updated a little bit into the season to allow for testing and tuning of classes/dungeons.